智能折腾[2] - 给 ESP8266 平台的 RGBW 灯泡刷机
本页目录
开篇废话
上个月参加了
TLUG Technical Meeting然后有位演讲者介绍了他的 Home Assistant 然后我也捡起来继续用了。 上一篇文章还是在 2020 年,拖更了快6年了草。
本文如标题所示,是给灯泡刷机,当然这个灯泡是 PDD 7元凑包邮购买的,自称支持 RGBCW ,当然最后测试的话缺少暖色调(看上去大概由彩色灯珠模拟?)
拆开来一看是 ESP8266EX ,不知道哪里来的外贸尾货就是了,叫做 EDSUN ,默认接了涂鸦平台。
我们改成 ESPHOME 平台凑合用用(
老中这种倾销式生产还是太恐怖了,带 ESP8266 的玩具居然10元以内就能买到了
正文
接 TTL
一开始我想用夹子的,但是看上去不让读,或者我的 CH341 光荣牺牲了 = =
最后焊了1H左右: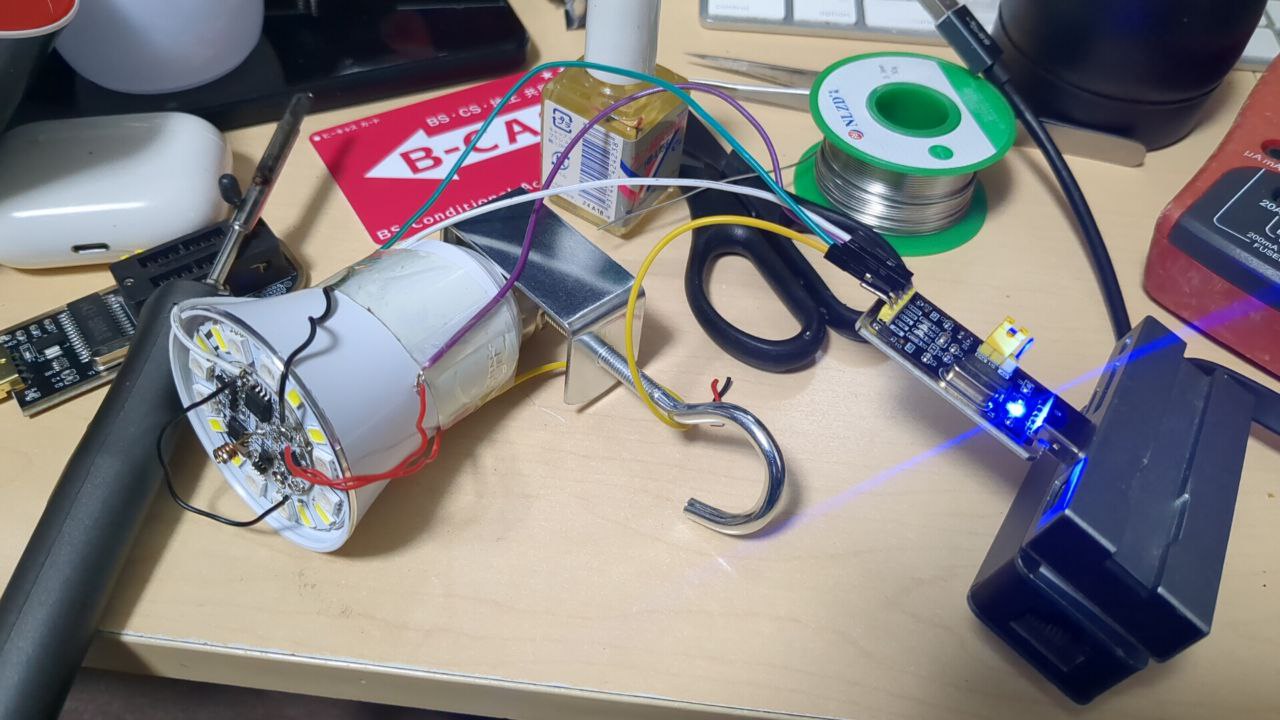
(后面才意识到很难吃锡的是线的原因
然后主板看上去就是完全的公版方案,我们一眼就知道该连什么: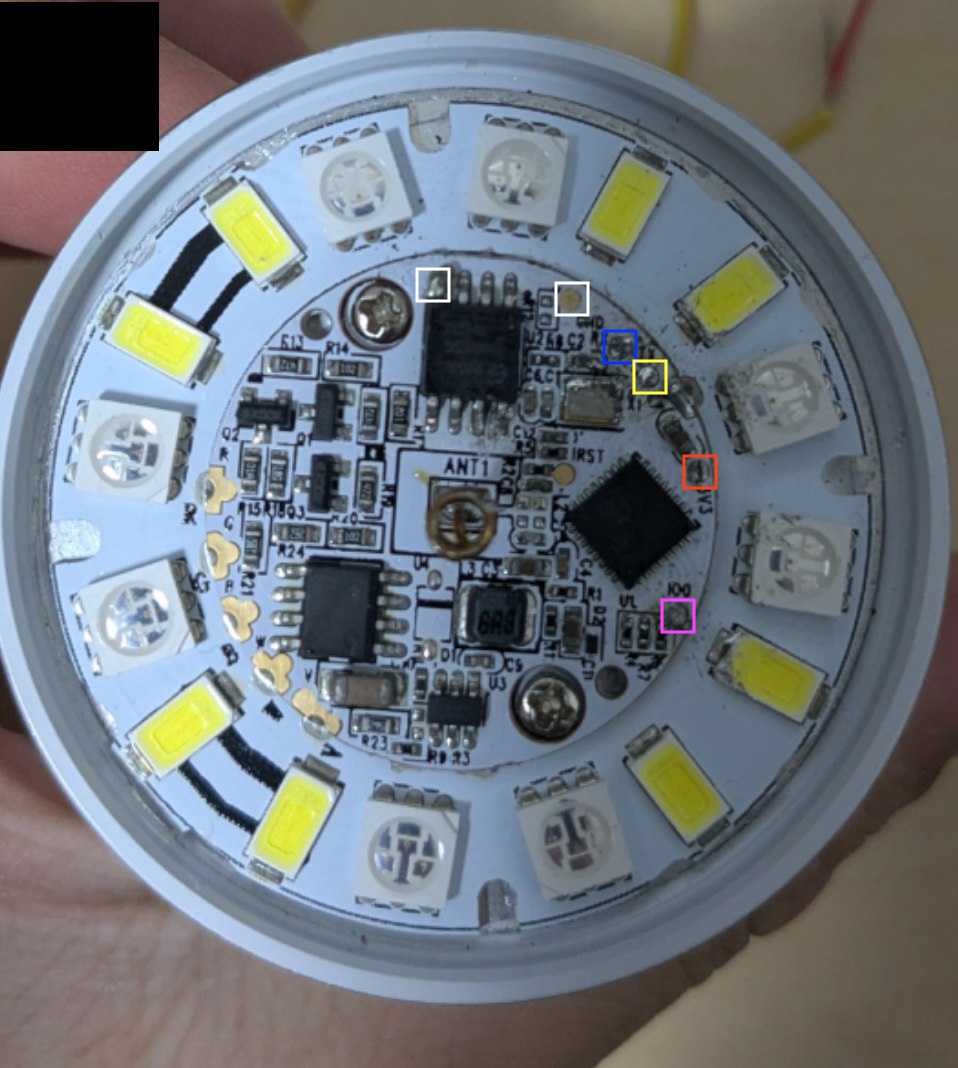
我推荐 GND 使用左上角 ROM 芯片的 pin ,这样好焊点,然后 IO0 (右下角紫色的那个)需要下拉电位,也就是接地,所以更推荐从 ROM 芯片左上角来接地,这样接两根线没啥问题,当然我觉得你需要万用表确认下(
然后 RX TX 3v3 就不说了。
备份固件
查了下这破玩意 ROM 为 25q80csig
是1M 的:
esptool --port /dev/tty.usbserial-140 read-flash 0x00000 0x100000 backup.img
2M 的话把 0x100000 -> 0x200000 以此类推。
ESPHOME
稍微改了下,反正能用就是了:
esphome:
  name: edsun_bulb

esp8266:
  board: esp01_1m

wifi:
  ssid: "IOT"
  password: "xxxxx"
  ap:
    ssid: "blub"
    password: "111111111"
captive_portal:

logger:
  baud_rate: 0

api:
  encryption:
    # 连接 hass 的话这里自己生成个 key
    key: <111>

ota:
  platform: esphome

safe_mode:

web_server:
  port: 80

output:
  - platform: esp8266_pwm
    id: white
    pin: GPIO4
    frequency: 400 Hz
  - platform: esp8266_pwm
    id: green
    pin: GPIO12
    frequency: 400 Hz
  - platform: esp8266_pwm
    id: blue
    pin: GPIO13
    frequency: 400 Hz
  - platform: esp8266_pwm
    id: red
    pin: GPIO14
    frequency: 400 Hz

light:
  - platform: rgbw
    name: EDSUN Bulb
    red: red
    green: green
    blue: blue
    white: white
    id: thelight
    color_interlock: true
    gamma_correct: 1.0
    restore_mode: RESTORE_DEFAULT_OFF
    effects:
      - random:
      - strobe:
      - flicker:
          alpha: 50% #The percentage that the last color value should affect the light. More or less the “forget-factor” of an exponential moving average. Defaults to 95%.
          intensity: 50% #The intensity of the flickering, basically the maximum amplitude of the random offsets. Defaults to 1.5%.
      - lambda:
          name: Tiny Smooth Rainbow
          update_interval: 1s
          lambda: |-
            static const uint8_t colors[12][3] = {
              {255,105,180},
              {255,0,0},
              {255,127,0},
              {255,255,0},
              {127,255,0},
              {0,255,0},
              {0,255,127},
              {0,255,255},
              {0,127,255},
              {0,0,255},
              {127,0,255},
              {255,0,255}
            };

            static int state = 0;
            auto call = id(thelight).turn_on();
            call.set_transition_length(500);
            call.set_rgb(colors[state][0]/255.0, colors[state][1]/255.0, colors[state][2]/255.0);
            call.perform();

            state++;
            if (state == 12) state = 0;
esphome compile bulb.yaml
ls .esphome/build/edsun_bulb/.pioenvs/edsun_bulb
firmware.bin          lib0d3  libda8
firmware.elf          lib4d9  libefd
firmware.factory.bin  lib6f5  libFrameworkArduino.a
firmware.ota.bin      lib760  libFrameworkArduinoVariant.a
FrameworkArduino      lib82f  src
ld                    lib96d
我们要刷的是 firmware.factory.bin 接下来 OTA 的话刷 firmware.ota.bin
确认颜色通道
output:
  - platform: esp8266_pwm
    id: test_gpio0
    pin: GPIO0
    frequency: 400 Hz

  - platform: esp8266_pwm
    id: test_gpio2
    pin: GPIO2
    frequency: 400 Hz

  - platform: esp8266_pwm
    id: test_gpio4
    pin: GPIO4
    frequency: 400 Hz

  - platform: esp8266_pwm
    id: test_gpio5
    pin: GPIO5
    frequency: 400 Hz

  - platform: esp8266_pwm
    id: test_gpio12
    pin: GPIO12
    frequency: 400 Hz

  - platform: esp8266_pwm
    id: test_gpio13
    pin: GPIO13
    frequency: 400 Hz

  - platform: esp8266_pwm
    id: test_gpio14
    pin: GPIO14
    frequency: 400 Hz

  - platform: esp8266_pwm
    id: test_gpio15
    pin: GPIO15
    frequency: 400 Hz

  - platform: esp8266_pwm
    id: test_gpio16
    pin: GPIO16
    frequency: 400 Hz


light:
  - platform: monochromatic
    name: "TEST GPIO0"
    output: test_gpio0

  - platform: monochromatic
    name: "TEST GPIO2"
    output: test_gpio2

  - platform: monochromatic
    name: "TEST GPIO4"
    output: test_gpio4

  - platform: monochromatic
    name: "TEST GPIO5"
    output: test_gpio5

  - platform: monochromatic
    name: "TEST GPIO12"
    output: test_gpio12

  - platform: monochromatic
    name: "TEST GPIO13"
    output: test_gpio13

  - platform: monochromatic
    name: "TEST GPIO14"
    output: test_gpio14

  - platform: monochromatic
    name: "TEST GPIO15"
    output: test_gpio15

  - platform: monochromatic
    name: "TEST GPIO16"
    output: test_gpio16
然后到网页里面自己按一下吧 = = 这里不教了,也没截图。
然后实际测了下 GPIO 然后看了下灯珠,理论上就是没有暖色的灯珠的 = = 所以其实就是 RGBW (RED+GREEN+BLUE+WHITE),不过凑合能用就是了。
总结
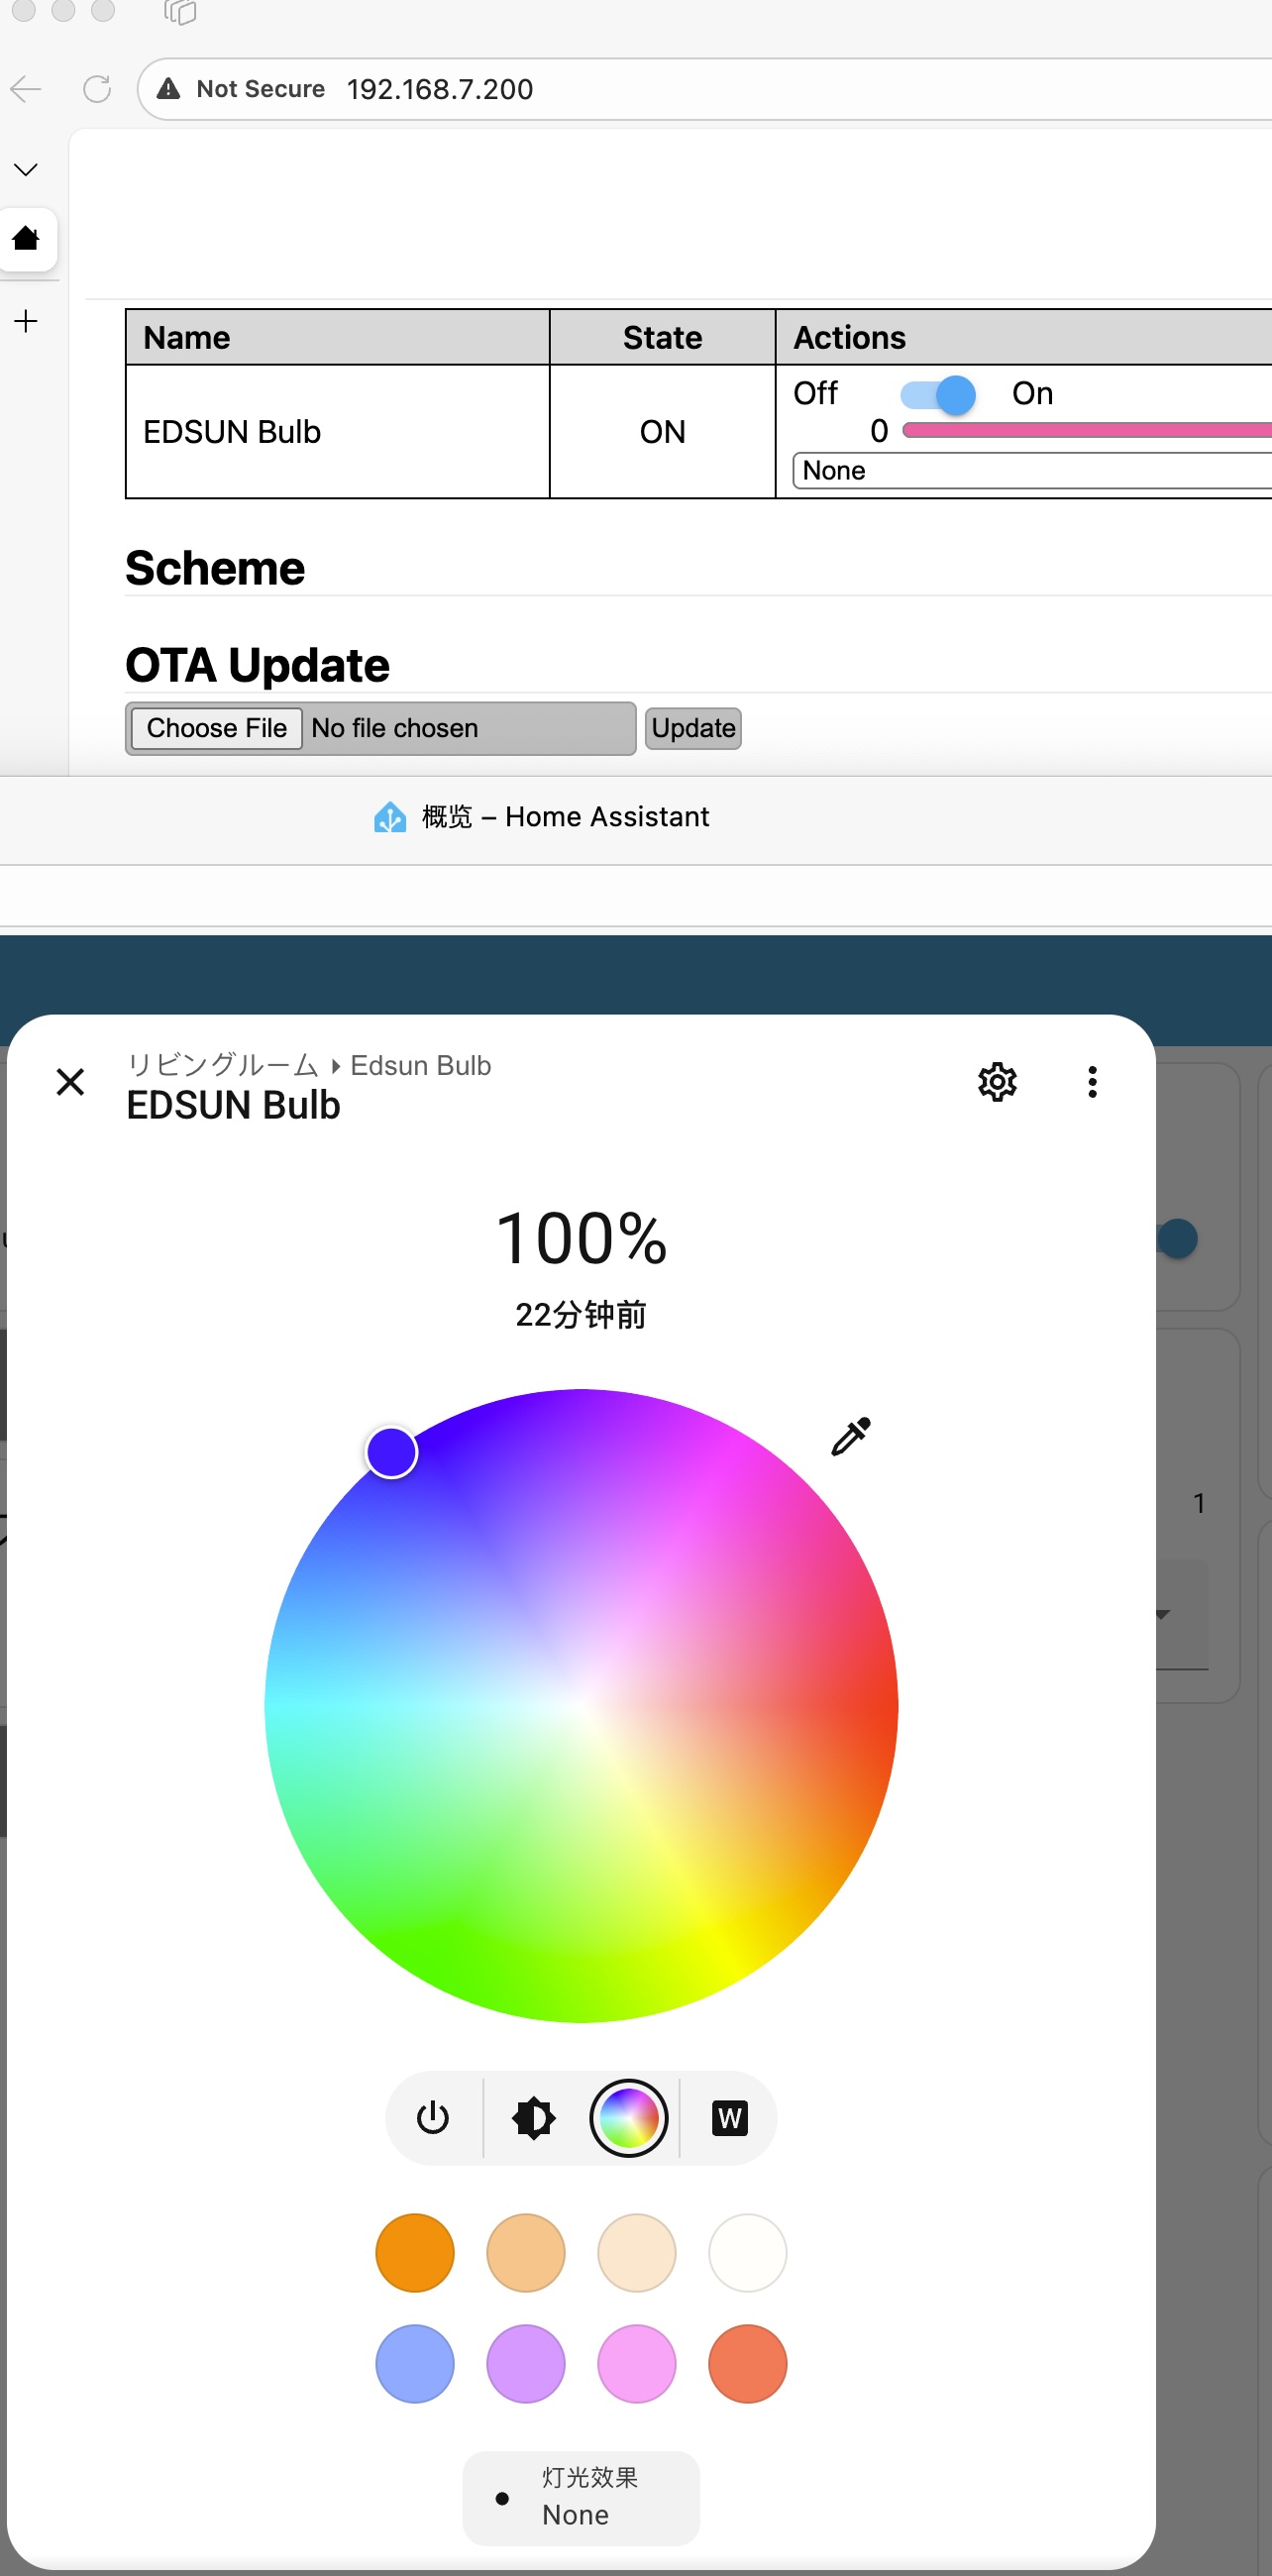 好久没搞智能家居了,毕竟搞这玩意之前得先有自己的家,很遗憾并没有(
当然刷这玩意的话,其实对于时间成本来说是完全亏本的,但是人还是要找点东西折腾下,对吧?
完